Ⅶ. How to scan a QR code using a cloud phone
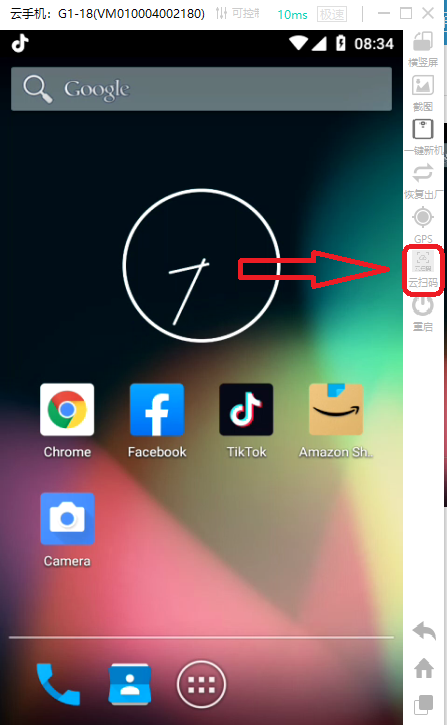
Step 1: Click the “Cloud QR code” button on the right side of the cloud phone.
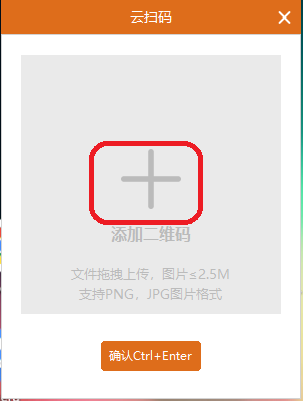
Step 2: In the pop-up window, click the “Add QR code” button.
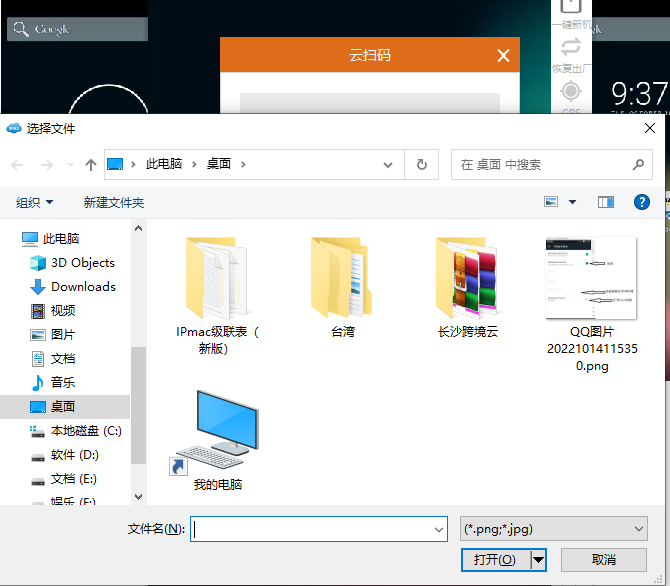
Step 3: Select the corresponding QR code image from your computer and click the “Confirm” button.
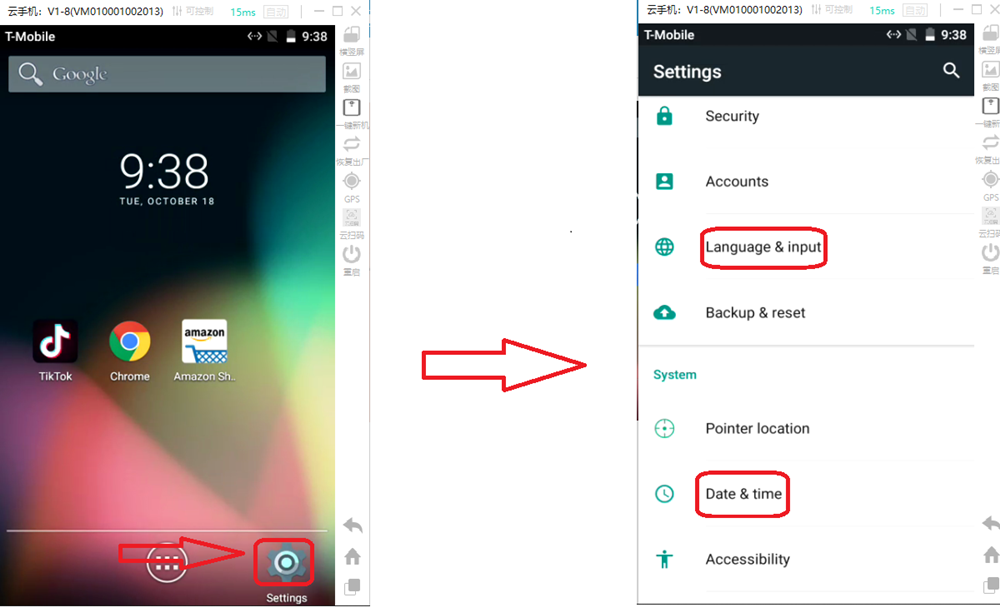
Ⅷ. How to change the language and time zone of the cloud phone
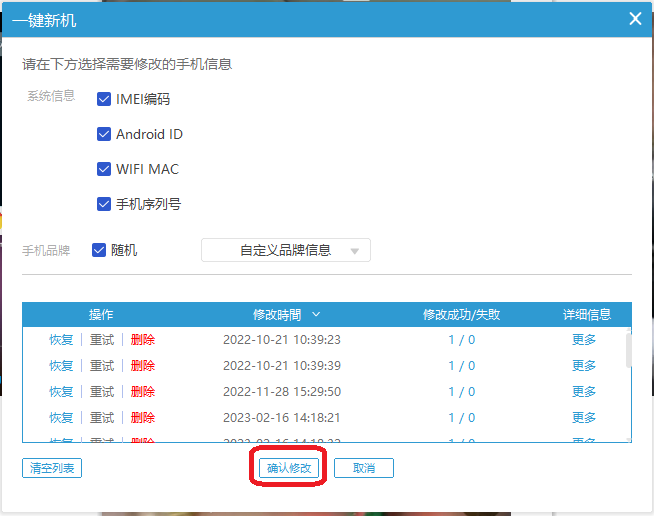
Ⅸ. How to operate the one-click new machine
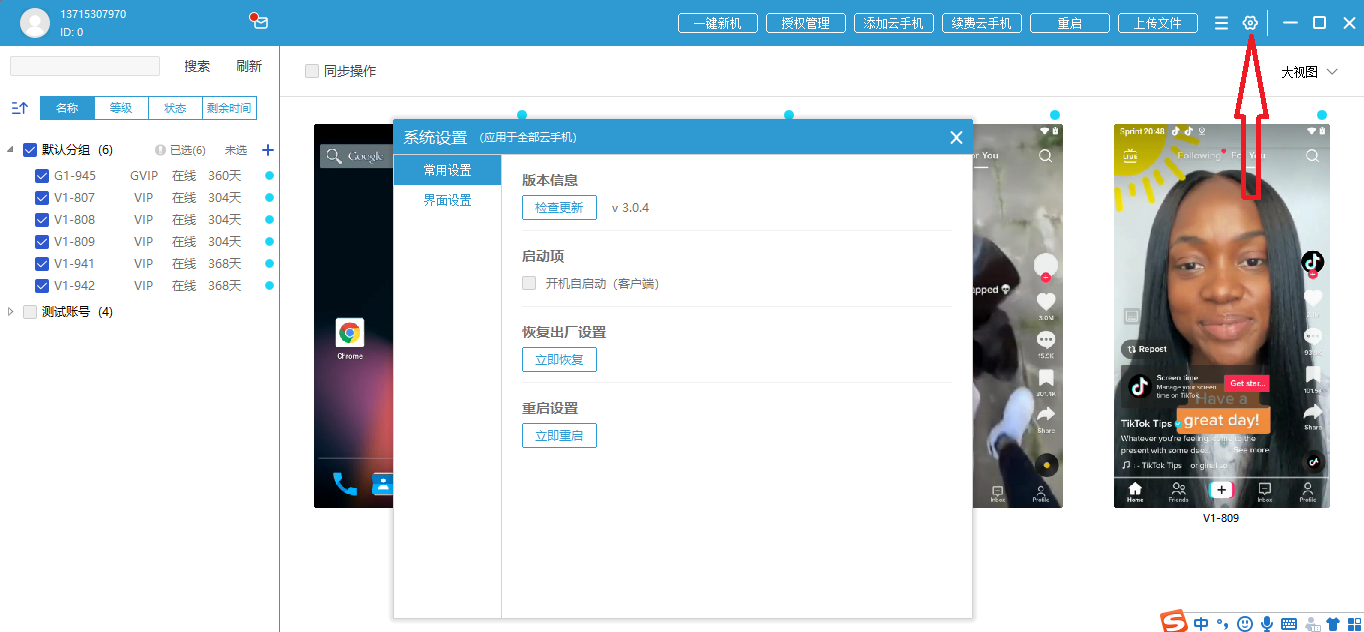
Step 1: Click the settings button in the top right corner of the client to bring up the shortcut settings menu.
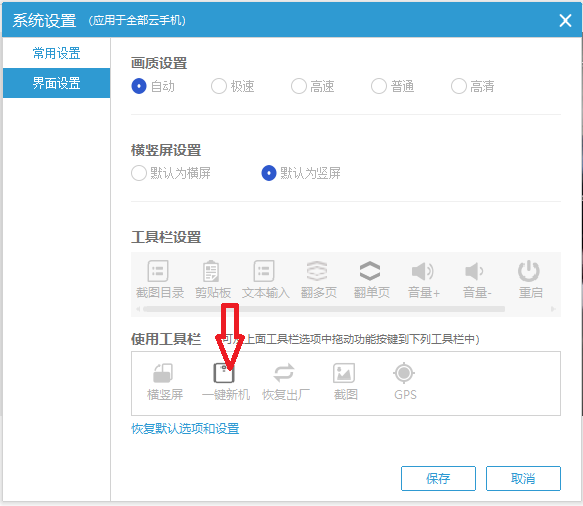
Step 2: In the pop-up shortcut menu, select the “Interface Settings” option, then drag the one-click new machine button from the toolbar settings down to the toolbar for use, and click the save button.
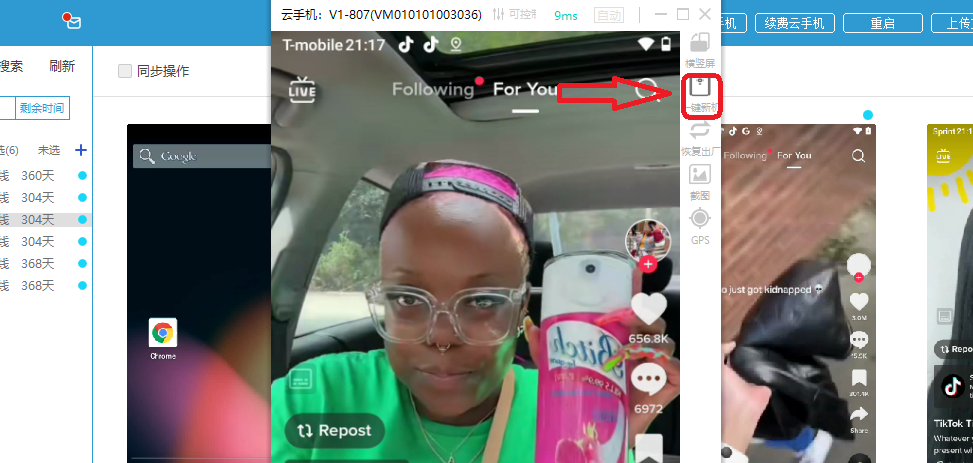
Step 3: Open the cloud phone interface and click the “One-click New Machine” button on the right side to bring up the flashing menu.
Step 4: In the flashing menu, click the “Confirm Modify” button at the bottom; the device will restart and generate new hardware parameters.
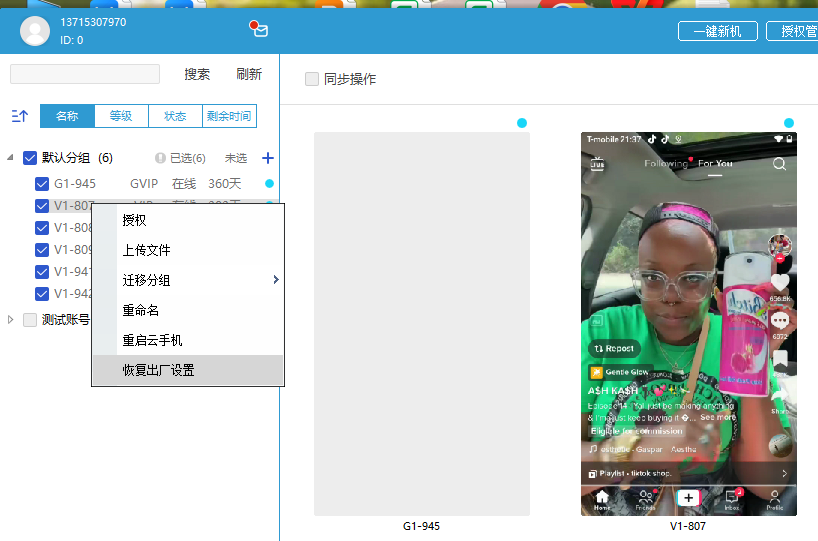
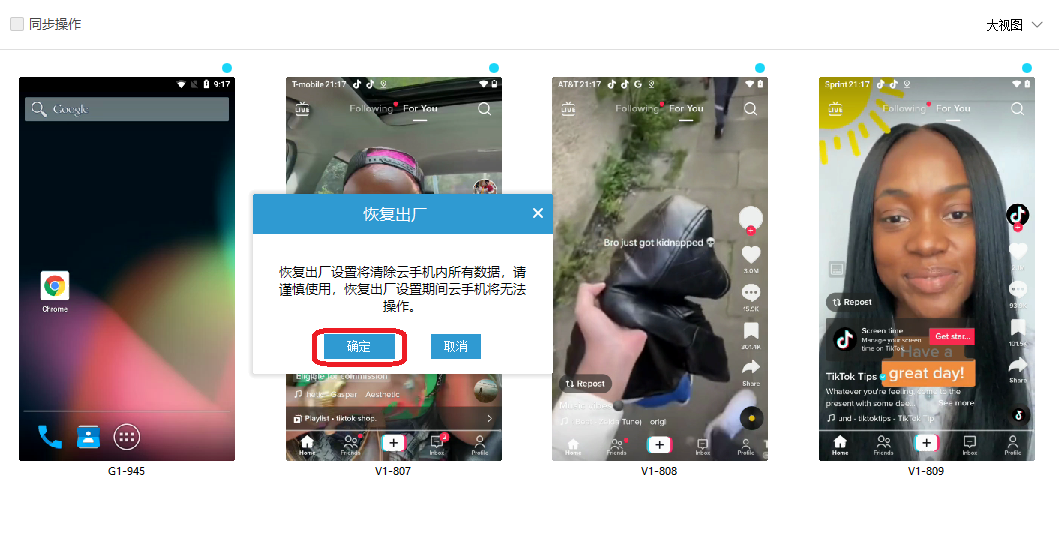
Ⅹ. How to restore factory settings
Step 1: In the top left corner of the client, check the cloud phone you want to operate, hover the mouse over the name of the cloud phone, right-click, and select the “Restore Factory” option from the drop-down list.
Step 2: In the pop-up menu, select the “Confirm” button; the system will restart and complete the factory restore operation.
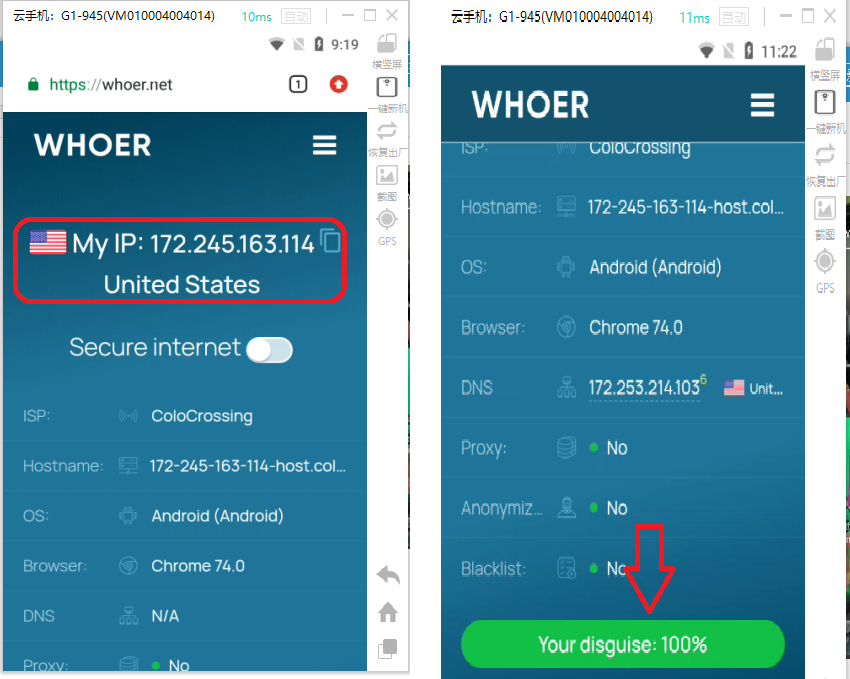
Ⅺ. How to test the internet environment of the cloud phone
Open the Google Chrome in the cloud phone, enter www.whoer.net, and you can check the location of the IP address of this machine and the safety of the network environment. If the network score is greater than 90%, it indicates that the internet environment is excellent.